Catching Up With Natalie
The Occasional Traveler and Lover of the Money Pit
Reupholstering Our Kitchen Chairs
When I told my husband that I wanted to reupholster our kitchen chairs, he asked how much that was going to cost and suggested I should just buy new chairs. That’s always his solution. Just buy it, just pay someone else to do it, yadee yadee.
Anyway…the thing is that there is some uncertainty for the next two to three years, of something that may or may not happen to our living arrangements. Three years ago, we thought of moving. We searched for almost a year and finally came upon a house that we really liked. An older house that was decent to move in but eventually needed to be fixed up to call it our own so we took the leap and put an offer on the house. Then there was the counter offer and another. At the end, we lost to another buyer by $8k and all cash offer. It was a sad day but I guess if it’s not meant to be yours, it will never be yours.
We continued to search for a few more months but we found nothing we liked, the real estate market sky rocketed and so we decided to stop looking. The next option was to do a major renovation on our house but I didn’t really find a contractor I liked and then with the arrival of our third baby, I had to put things into perspective on what we could handle and decided to put everything on hold while I figured out things and our budget.
But I am regressing….so back to the chairs….given the fact that I don’t know where we will be in the next few years, I don’t want to buy furniture that may not work long term. I like to buy a few quality pieces and keep indefinitely. It takes a lot of energy and time to search for furniture and sometimes the pieces may not work out but you end up stuck with them. With that thought in mind plus I wanted to learn upholstery, I decided to reupholster the kitchen chairs by putting in new cushions since the old ones were pretty worn out. We’ve had our kitchen dining set for more than 13 years if you can believe that!!
A few supplies that I needed:
- Upholstery staple gun
- Staple remover (need the heavy duty one for upholstery)
- Philips ranch srew driver
- New seat pads/cushions
- Batting (Optional, I did not use any but in hindsight, I kind of wished I did)
- Furniture fabric
- Scissors
I suggest doing this outside or in the garage just because it makes clean up easier and the foam particles are not all over your house.
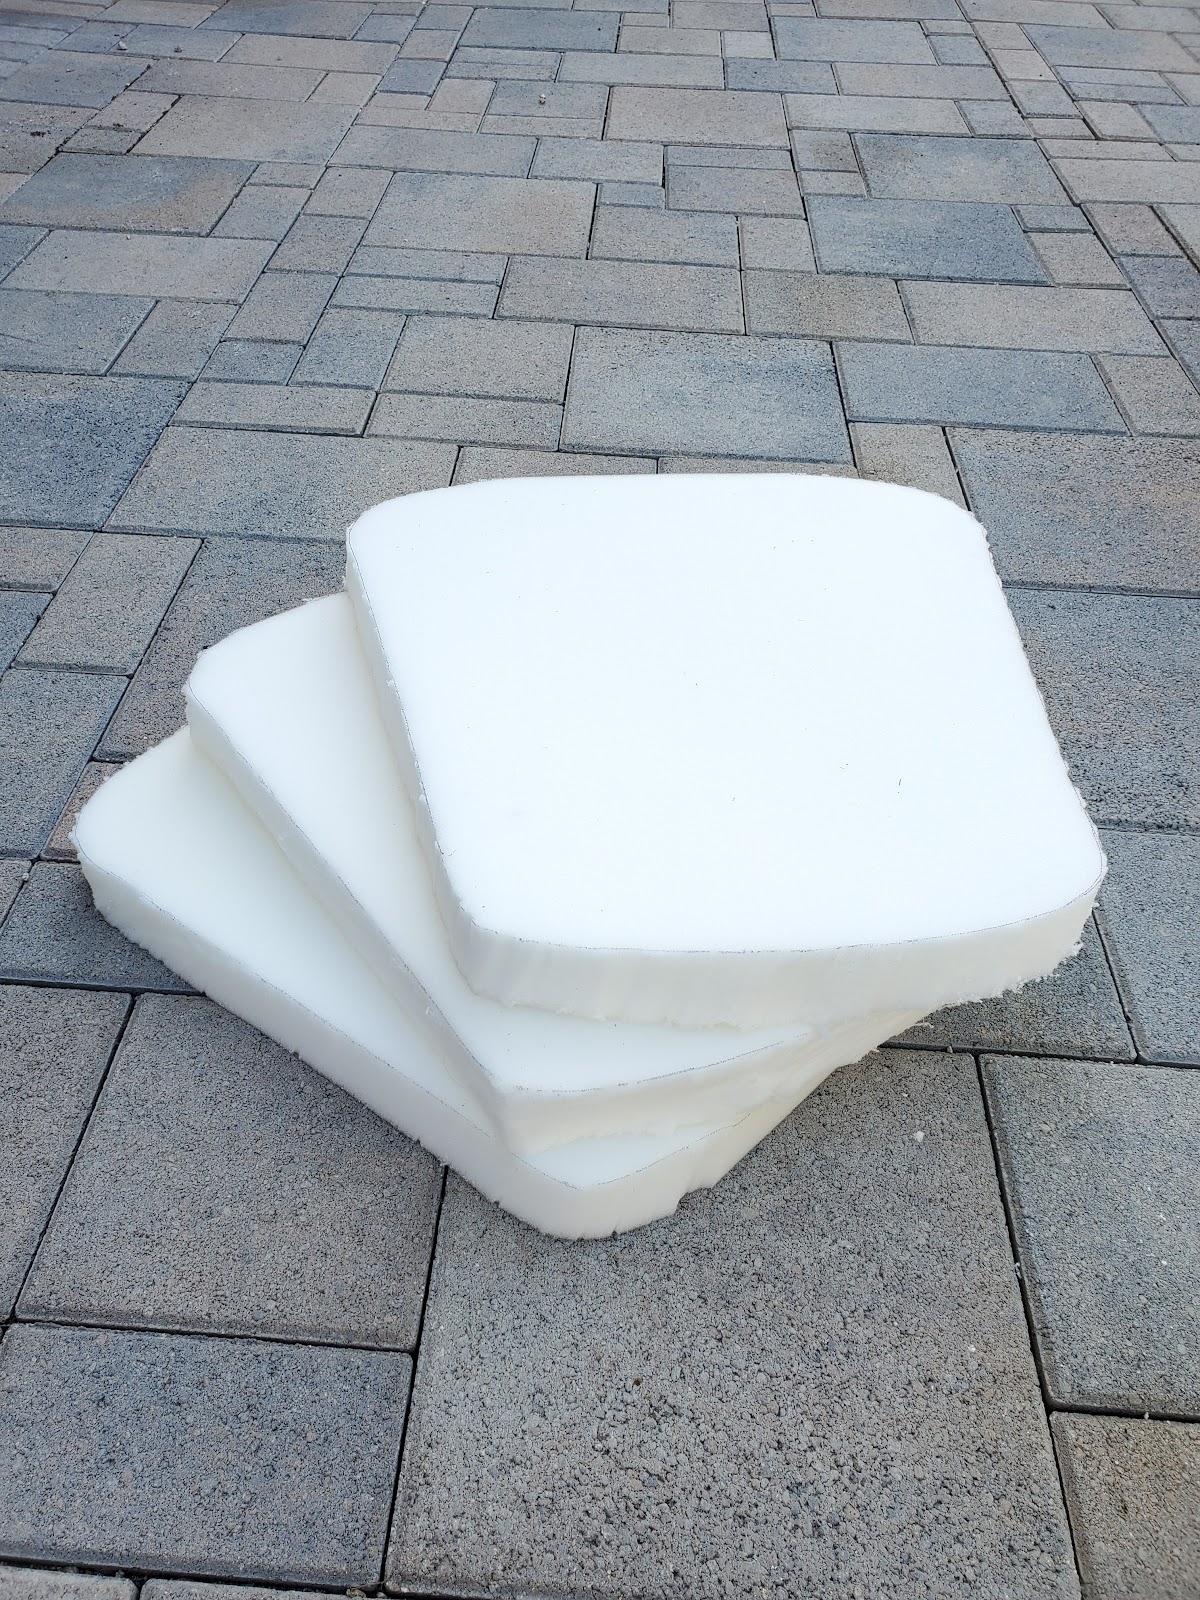
These chairs had 6 screws that I had to unscrew to remove the seating. Once seating was removed from the frame, I took off the staples from under the seat, then I placed the seat on the foam so that I could figure out how much to cut.

I drew in how big of an area I needed. It was not a perfect outline but worked for what I needed to do.

For the first foam I cut (not pictured here), I used a pair of scissors so the sides were not straight. This is where if you had batting, the batting could have hidden the lumpy sides but since I was putting fabric over the foam, it wasn’t so obvious unless you run your hands through the side. After that first cut, I researched on how to cut foam and found that using a bread knife would be effective for cutting foam.
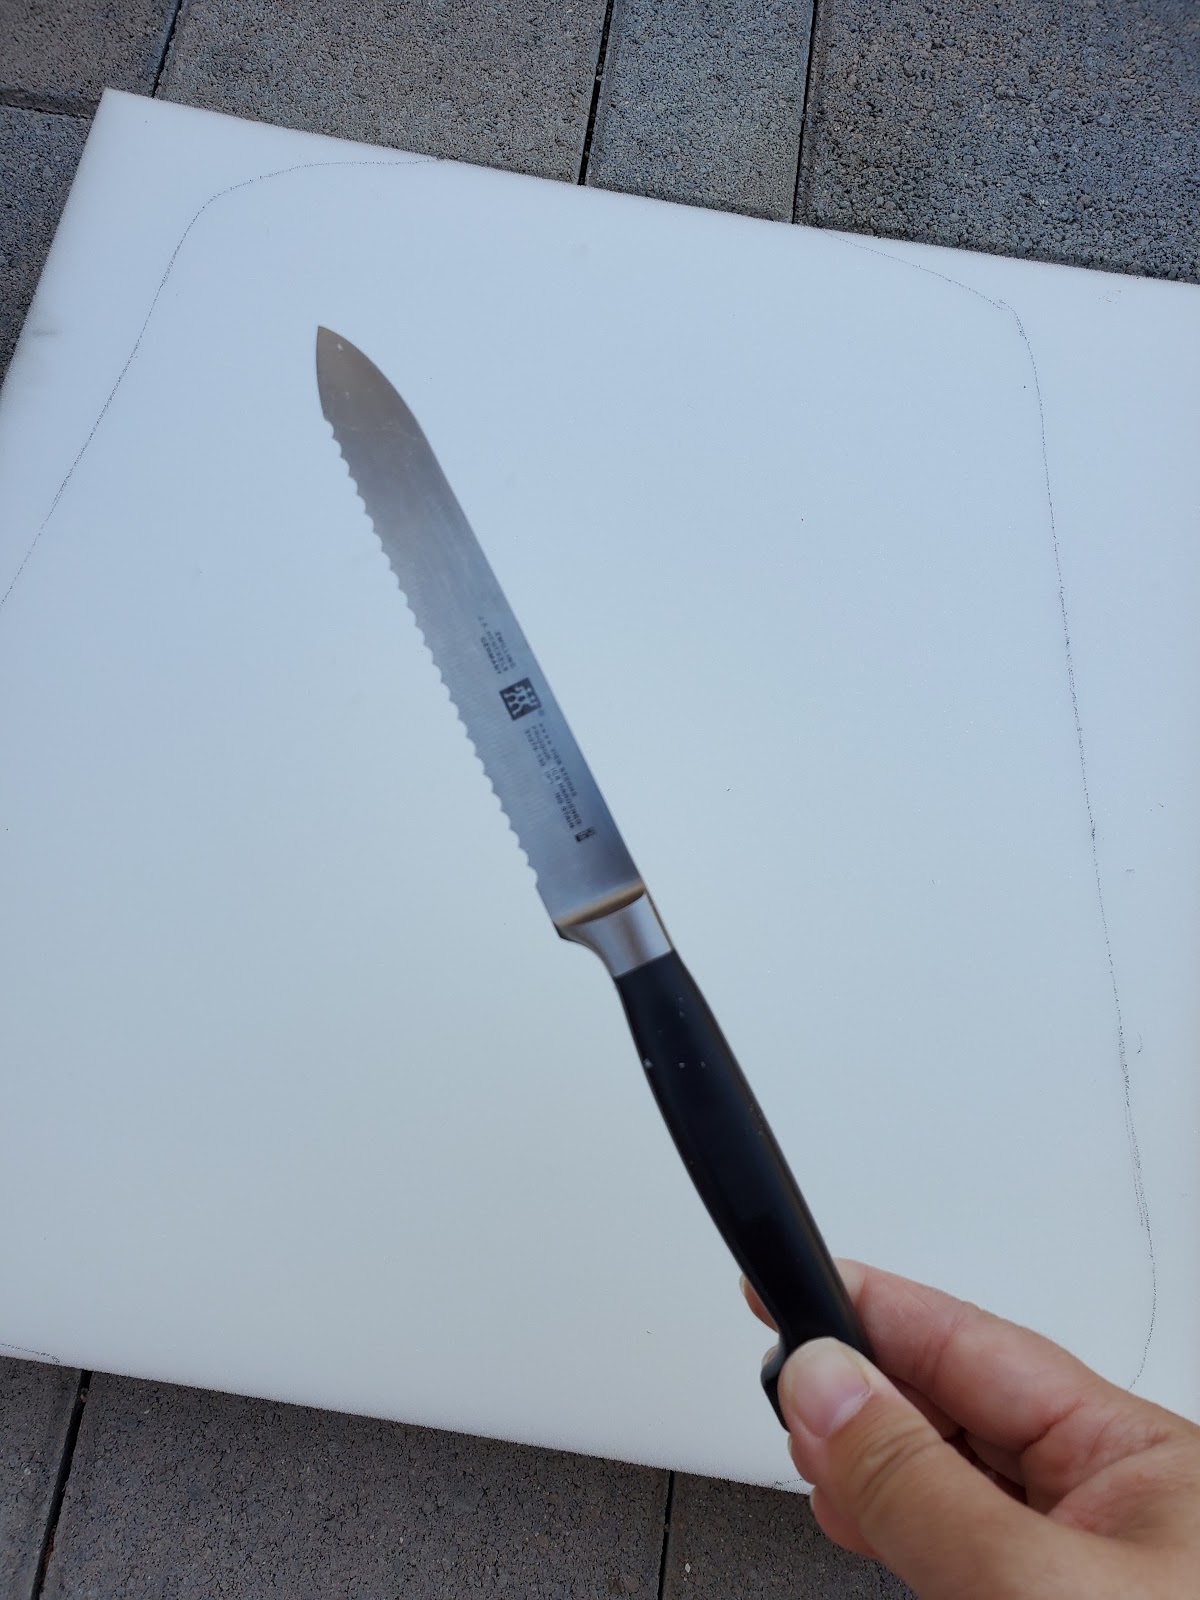
So for the next three foam, I used the bread knife to cut. They weren’t perfect but a lot better than my first one.
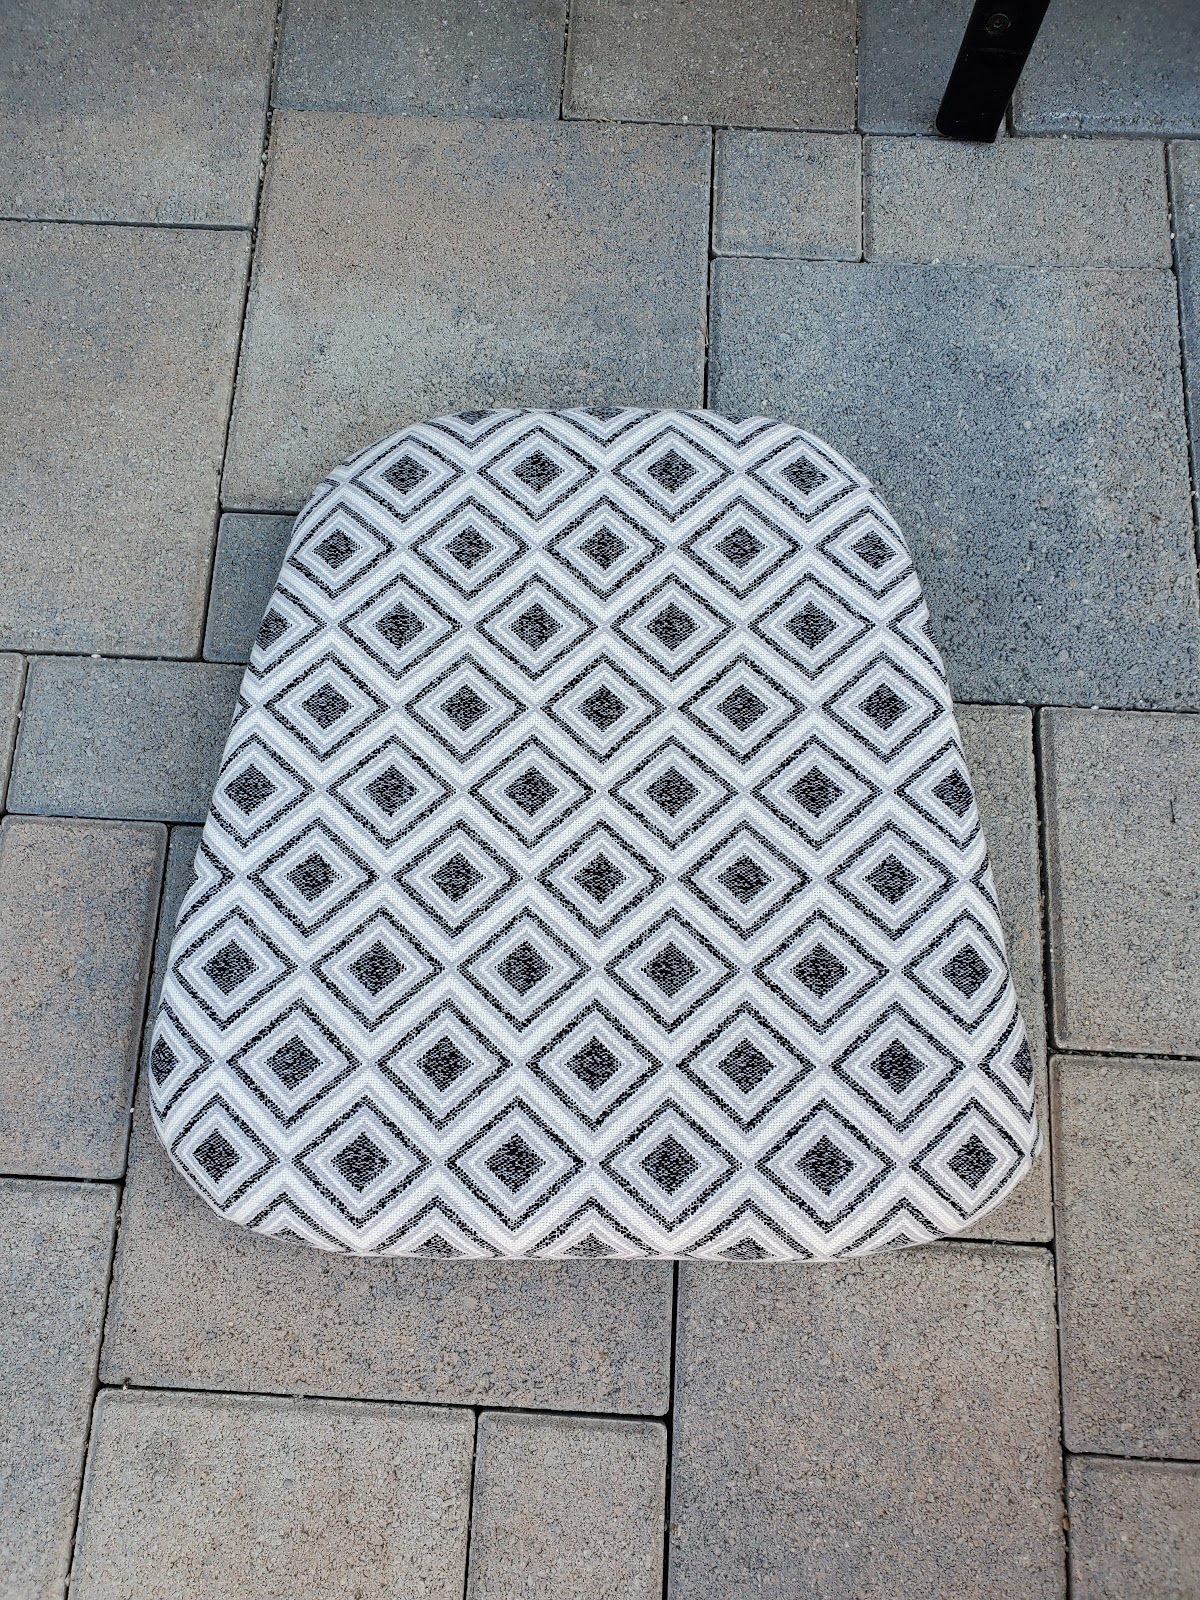
Next was placing the foam, the seat and the fabric together to start stapling.

I found that the corners were the hardest.
Time to staple the black mesh sheet to hide the seat frame.

All done with two.

Eventually I completed all four chairs. Tada!!

What I learn from this DIY:
- Reupholstering chairs is not too hard, just takes time.
- Use an electric drill when possible, makes the job go quicker.
- Selecting fabric can take a while.
- Corner stapling takes practice and don’t expect to be perfect.
- Make sure to have staple remover, makes task easier.
Total cost of my project was about $ 60, $ 30 for the fabric (bought at Joann’s), $ 25 for the foam padding (bought on Amazon, unholpstering stapler, stapler mover and staples $ 20 (bought from Amazon).
About The Author
admin